Home automation using Amazon Alexa and NodeMCU
Introduction-
In this, you will learn how to turn your home into a smart home with the use of NodeMCU and Amazon Alexa/Google assistant. This project will help you switch ON/OFF your electrical devices using voice commands or your smartphone.
Features-
1. Controlling AC appliances using voice commands.
2. It can be switched ON/OFF through the internet from anywhere and at anytime.
3. You can monitor switch status anytime.
4. It can be used to control up to 8 devices.
Components Required -
1. NodeMCU - ESP8266 (Amazon)
2. 5V Relay Module - 4 channel (Amazon)
3. Power supply for NodeMCU - (5V)
4. Connection Wires (Amazon)
5. Amazon Alexa/Google Assistant (Amazon Alexa-Echo / Echo dot )
What is a relay?
A relay is an electromagnetic switch operated by a relatively small current signal. They are used where it is necessary to control a circuit by a separate low-power signal or where the circuits must be controlled by one signal.
In this project, we will use an electromagnetic relay in series with our electrical devices to switch ON/OFF.
About sinric.com(Account Required)
Sinric.com is a simple, elegant way to link your development boards like RaspberryPi, ESP8266, ESP32 or Arduino with Amazon Alexa or Google Home for Free.
Circuit schematic-
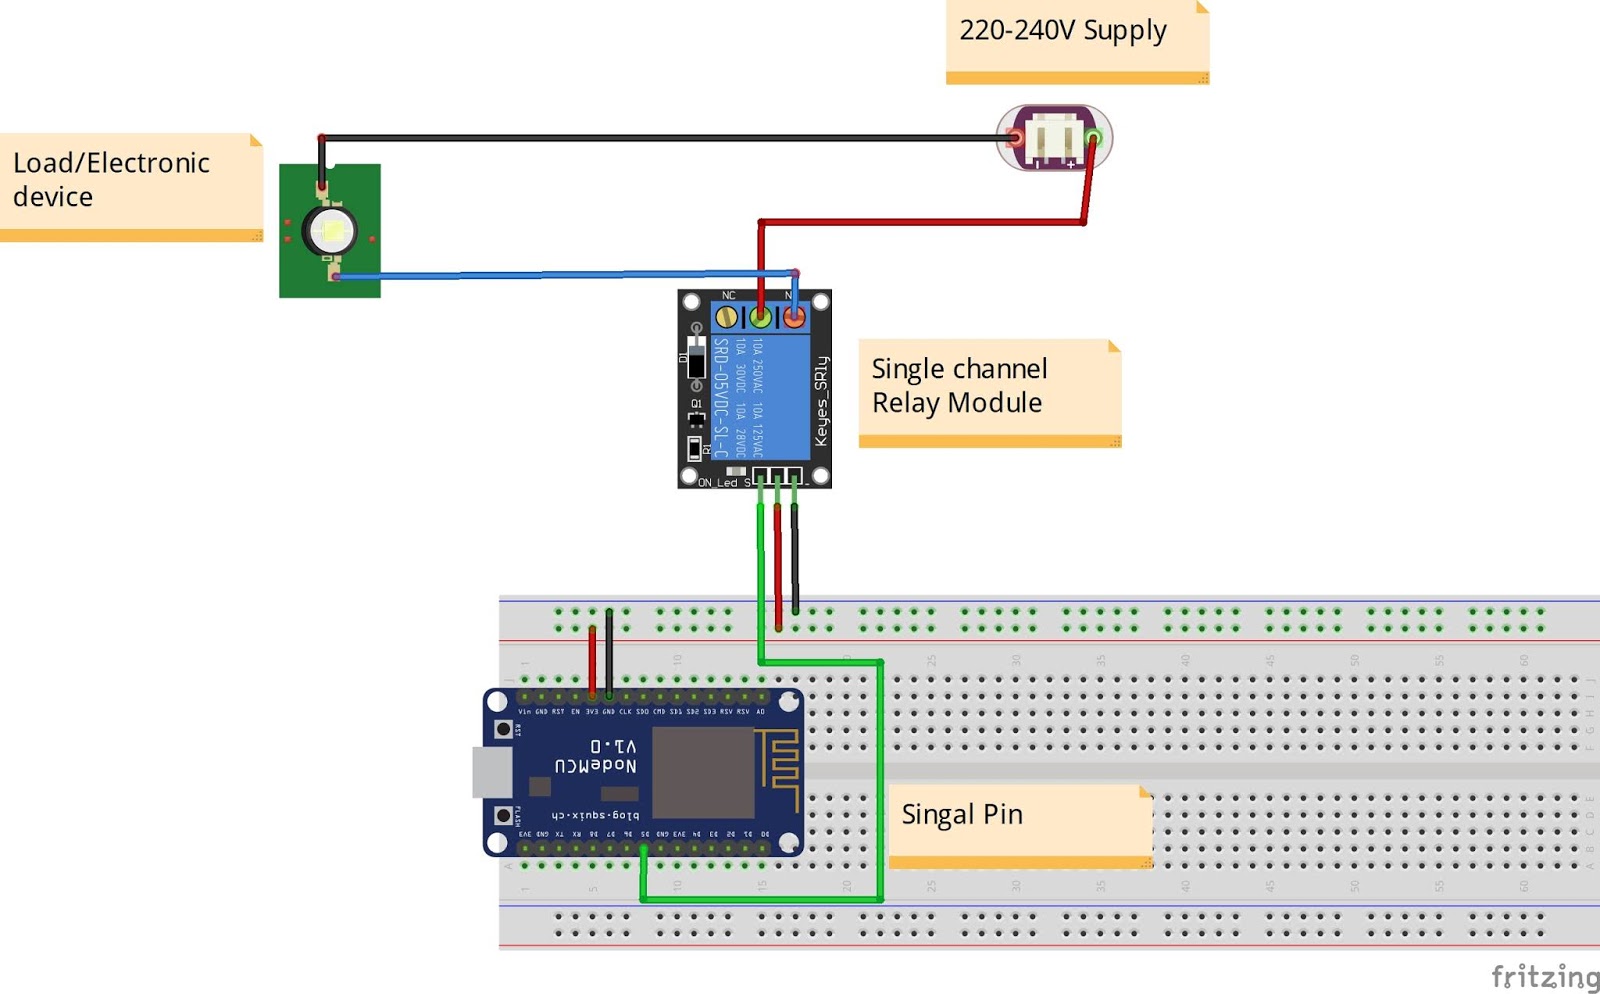
Connections-
1. Power up the relay module by connecting VCC to the 3.3V of the NodeMCU and GND to GND.
2. Connect the signal pins(GPIO) of the NodeMCU to the labeled data-in pins(IN1, IN2....) of the relay module.
3. Connect the Neutral of the AC mains to the Load/Electronic device and the live to the COM of the relay.
4. Connect the other terminal of the load to the NO pin of the relay.
5. The circuit should look like the above-shown circuit.
Note- Be careful while working with mains voltage. It can lead to electric shock or even death.
How to add devices to Alexa-
1. Create a smart home device (Example - "Light One": Switch)
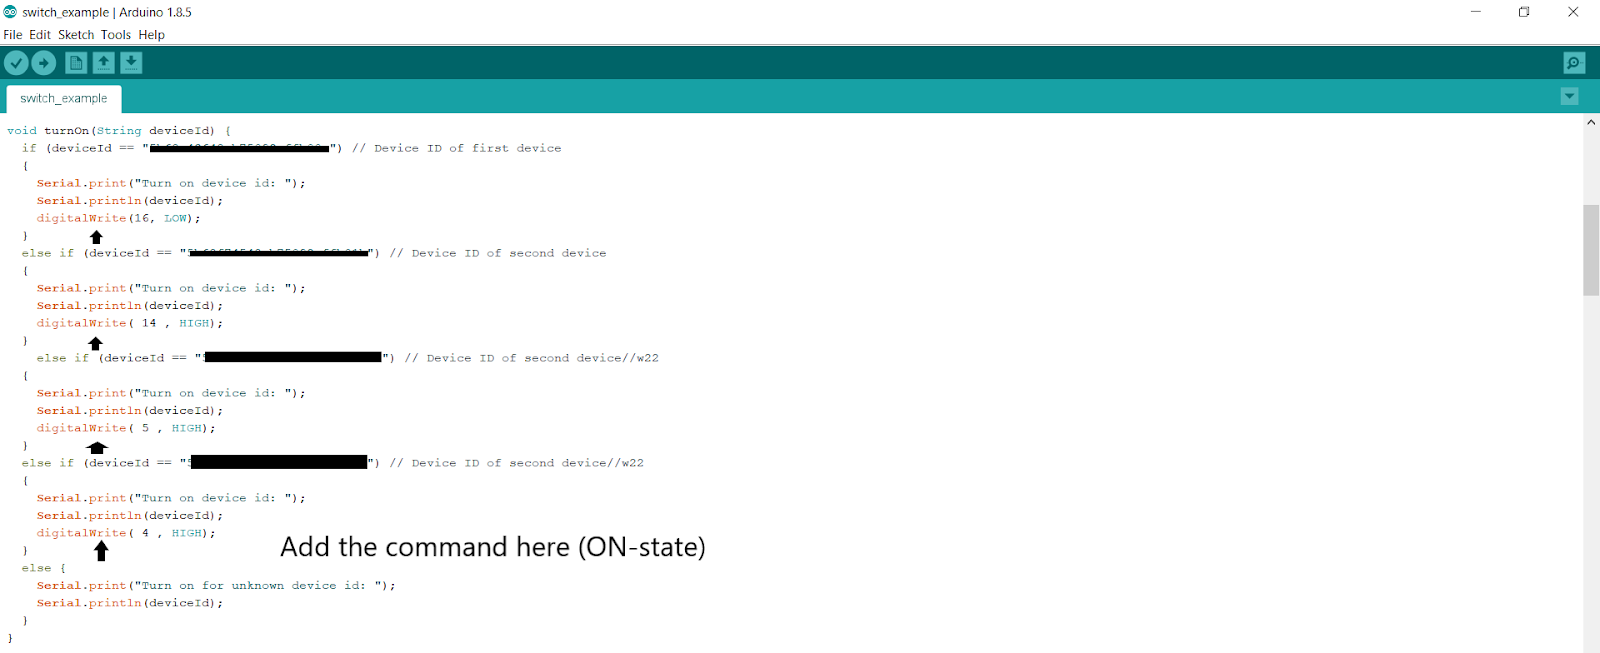
2. Copy the Device ID of the smart home device you created to your code.
3. Define the On/Off function for it.
4. Repeat the above steps for other devices you want to create.
5. Upload the code to NodeMCU.
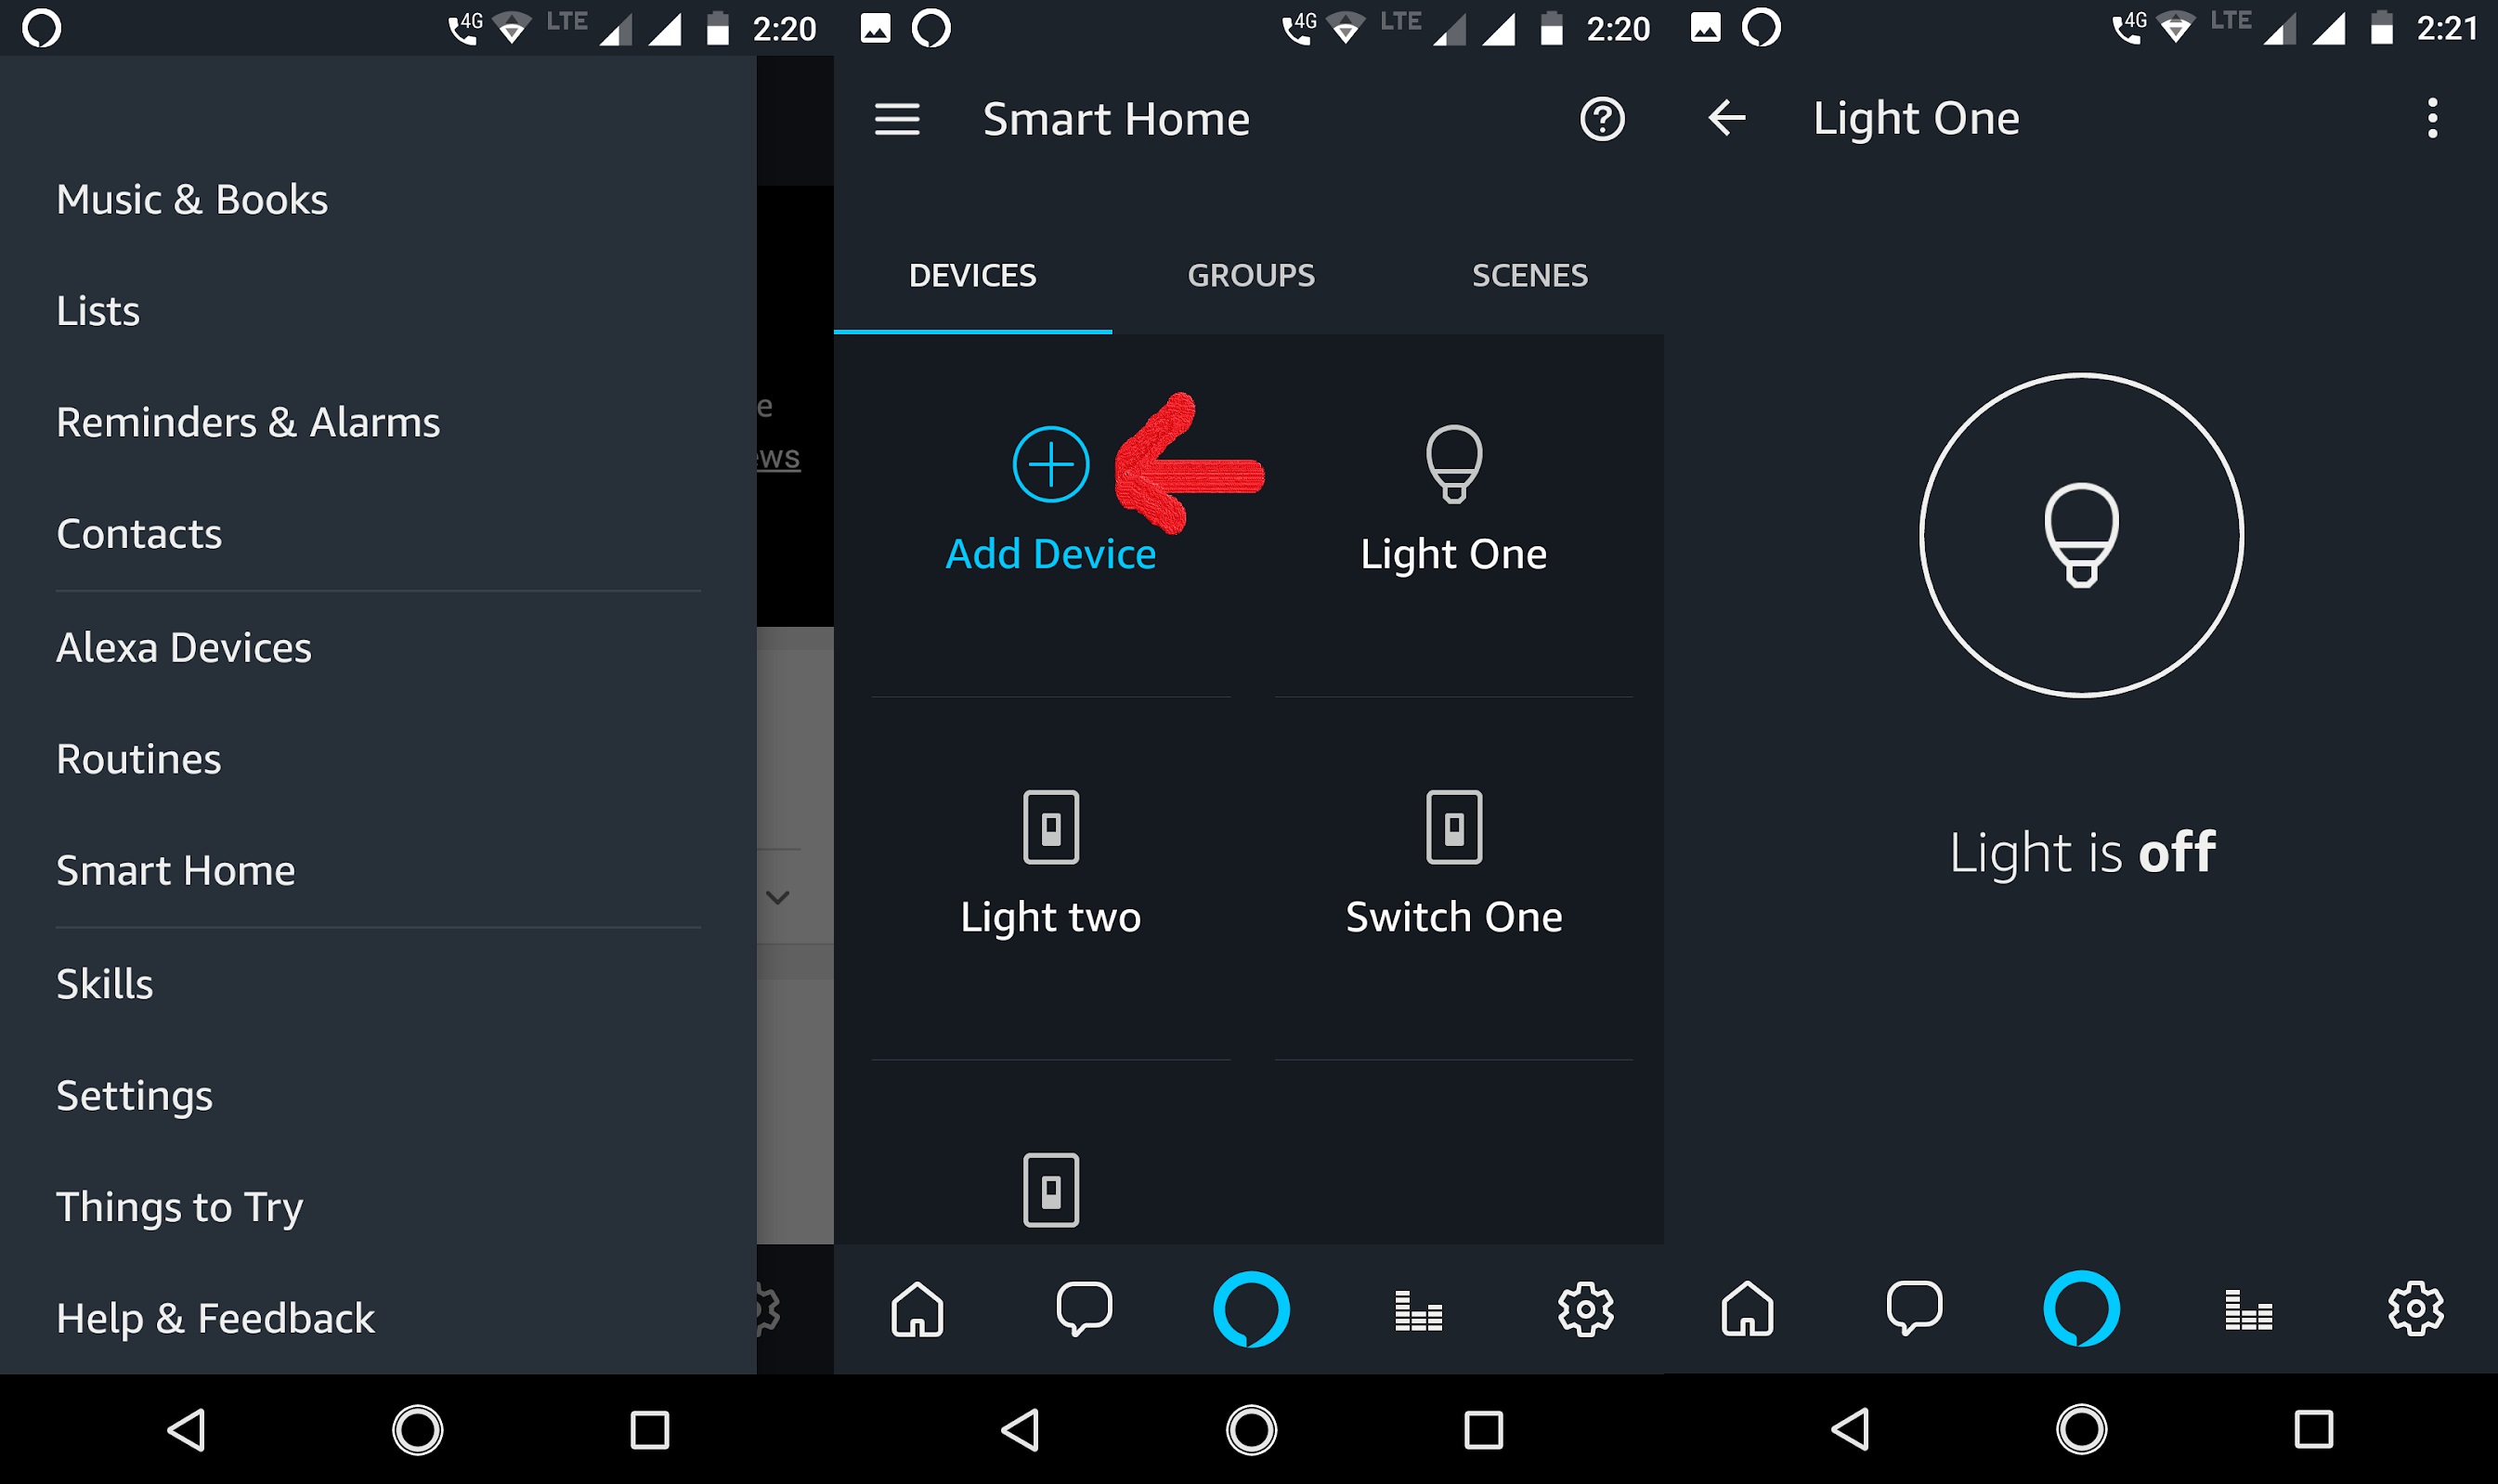
6. Power up the circuit and go to the Alexa app on your device and then go to the smart home section.
7. Search for devices. And it is done.
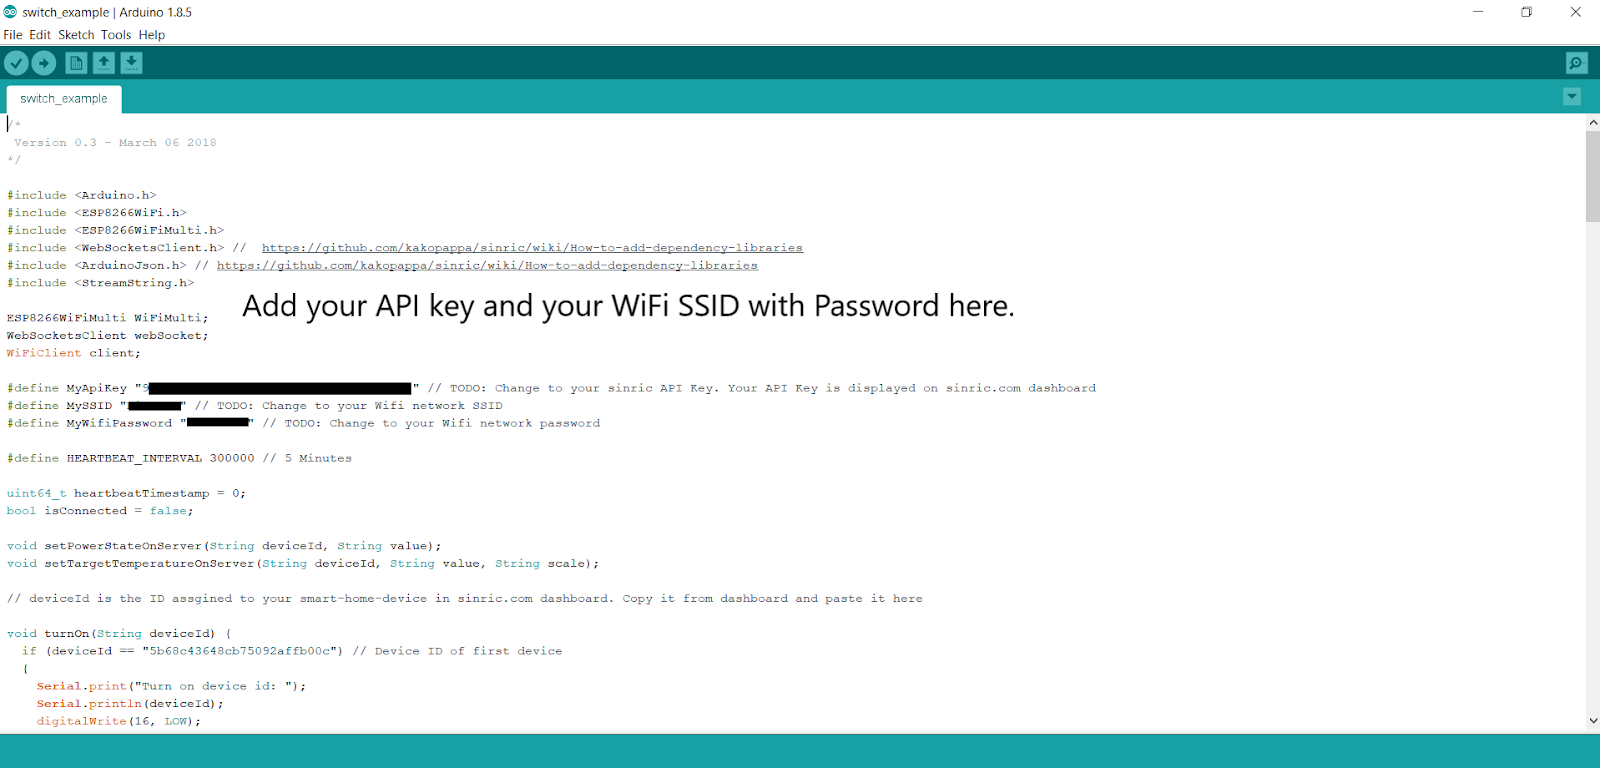
Note- In the code, you must paste your API key and your WiFi SSID along with the password.
The code:
You can get the code from here.
1. Write your API key and your Wifi SSID with the password here.
2. Add the TurnOn-(On state) and TurnOff-(Off state) commands to your code. In my case it was digitalWrite() function.
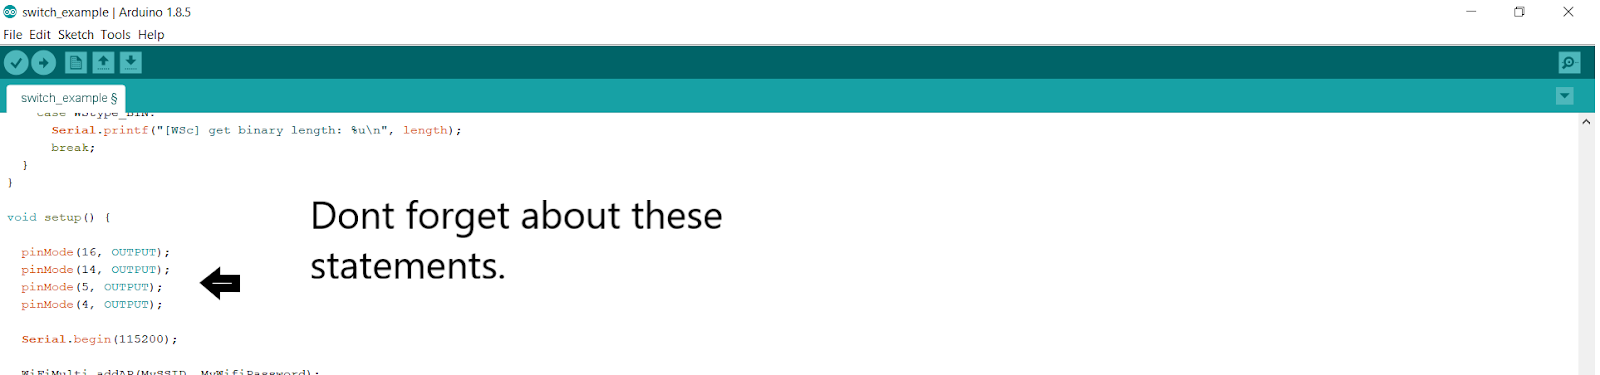
3. And do not forget to include these commands to your code.
4. After uploading the code, Go to the Alexa app and then go to the Smart home section.
Warning- Mains voltage is dangerous, it can lead to electric shock or maybe even death. Be careful while dealing with it.
Note- If you face any problem with this project, you can ask questions in the comment section. The IDE code only works for board version 2.5.1 and ArduinoJson version 5.13.2
Track CORONA Virus Online on this Website
Related post


0 comments
Leave a reply
Please Login or Register to Comment. Get StartedShare this article