Arduino Traffic light control
Arduino is an open-source electronics platform based on easy-to-use hardware and software. It's intended for anyone making interactive projects. In this post, We will learn to create a simple traffic light control system using the Arduino microcontroller board.
Components Required-
1. Arduino Board
2. 3x LEDs - (Red, Yellow and Green)
3. 3x 220ohms Resistor
4. Connection Wires
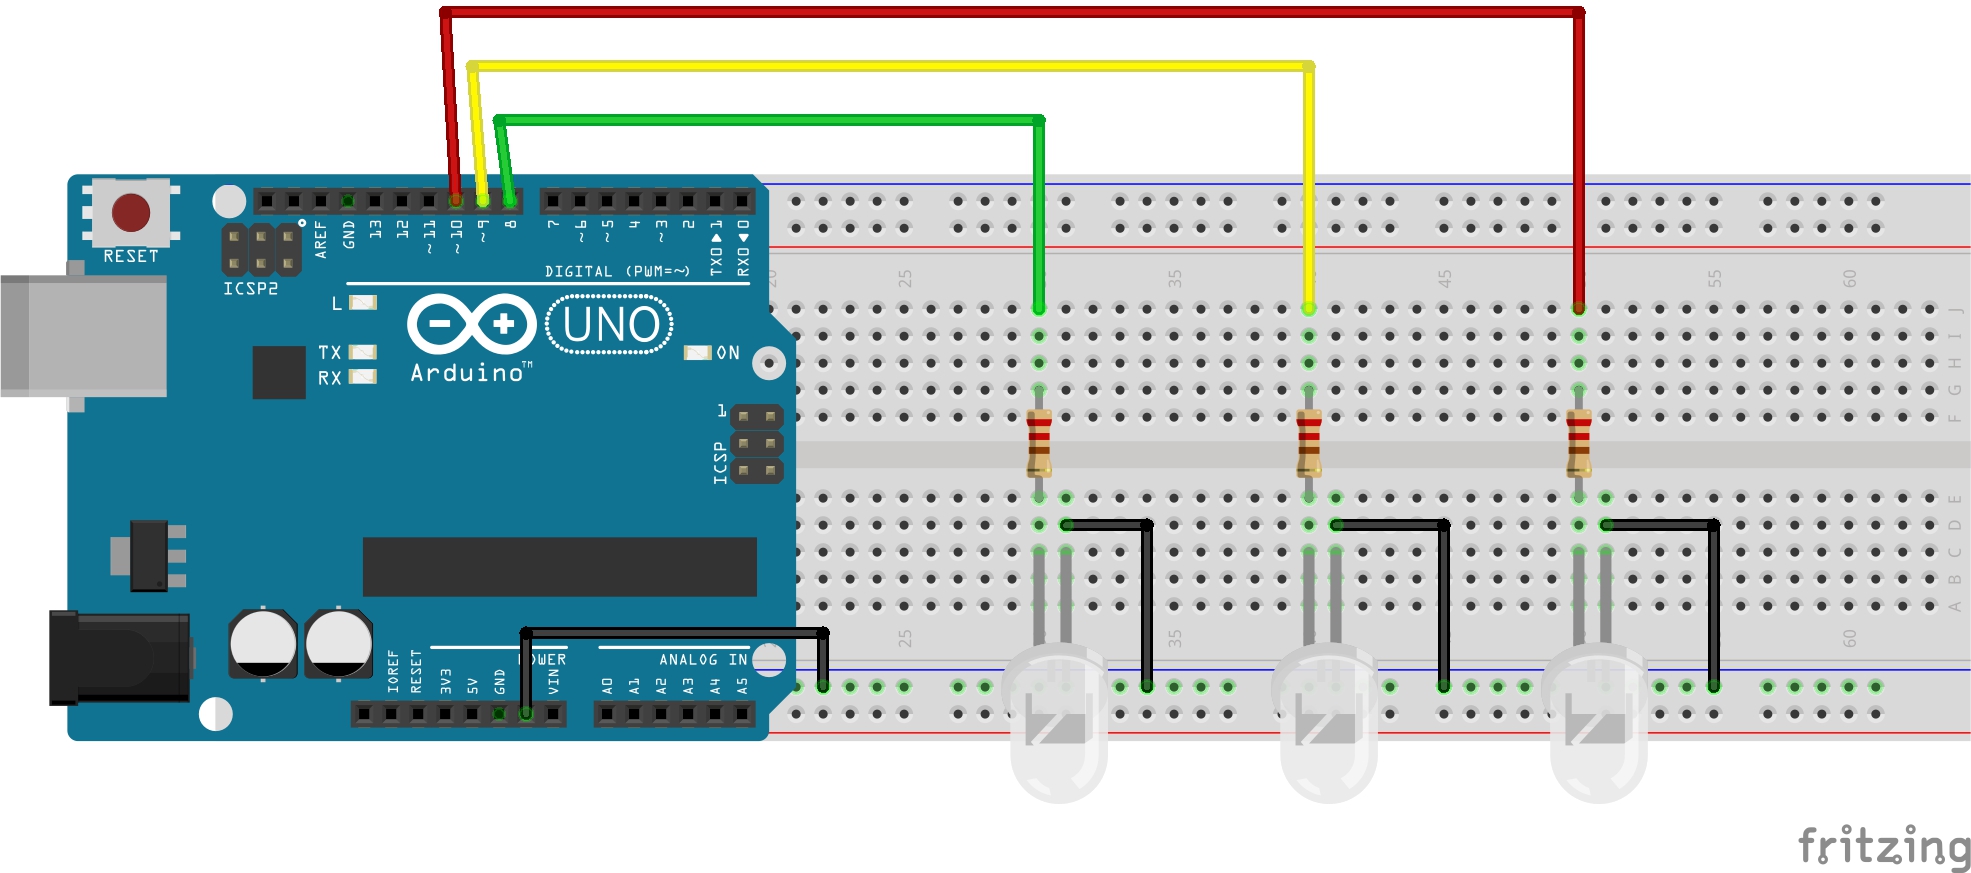
Connections -
1. Connect the +ve terminal of the Red LED to the Pin 10 through a 220ohm resistor and the -ve terminal to GND.
2. Connect the +ve terminal of the Yellow LED to the Pin 9 through a 220ohm resistor and the -ve terminal to GND.
3. Connect the +ve terminal of the Green LED to the Pin 8 through a 220ohm resistor and the -ve terminal to GND.
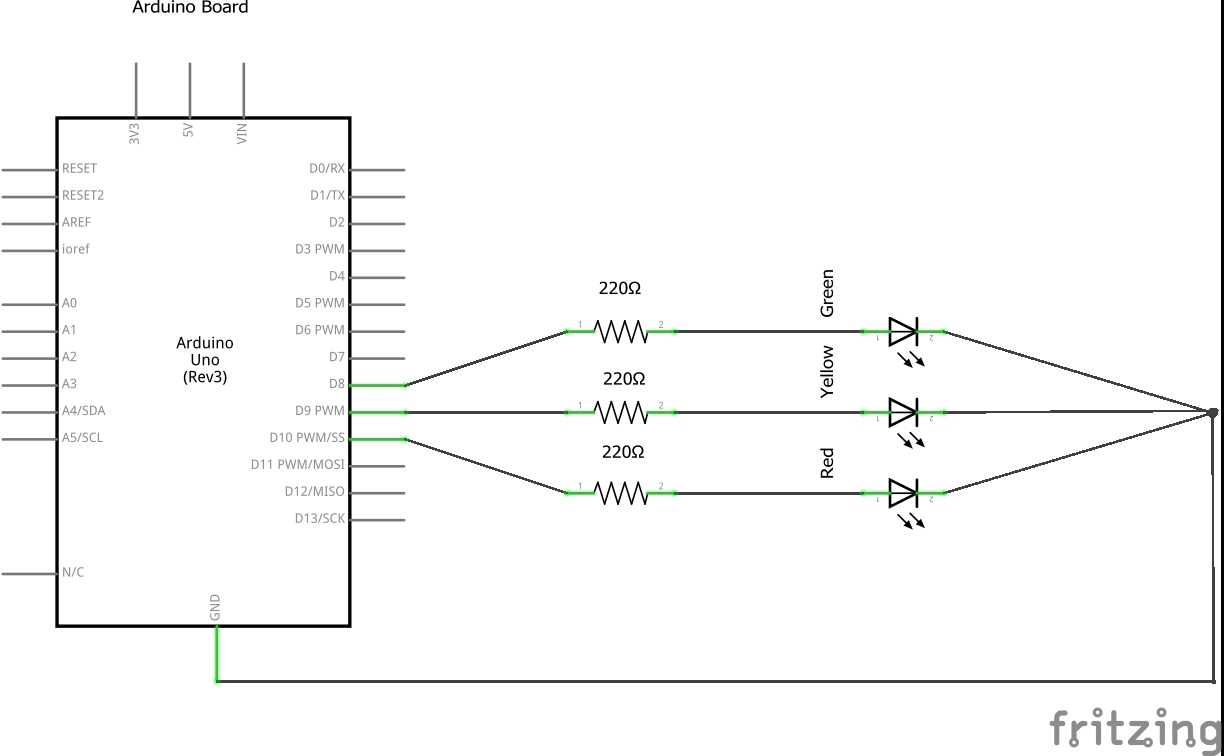
Circuit Schematic -
Working-
The microcontroller triggers the LEDs On/Off according to the uploaded code. In the code given below,
1. pinMode( 10, OUTPUT); - It declares the pin as OUTPUT pin.
2. Delay(1000); - this causes a delay of 1 second ( 1000 = 1 seconds)
3. digitalWrite( 10, HIGH/LOW); - This turns the pin to HIGH/LOW accordingly.
Code -
* Made by Nishant_Kr*
void setup() {
  pinMode(8,OUTPUT); // Set on Output mode
  pinMode(9,OUTPUT); // Set on Output mode
  pinMode(10,OUTPUT);// Set on output mode
}
void loop() {
  digitalWrite(10, HIGH);          // Set on HIGH as ON
  delay(5000);                 // 5 seconds delay
  digitalWrite(10, LOW);           // Set on LOW as OFF
  digitalWrite(9,HIGH);            // Set on HIGH as ON
  delay(1500);                 // 1.5 seconds delay
  digitalWrite(9, LOW);            // Set on LOW as OFF
  digitalWrite(8,HIGH);            // Set on HIGH as ON
  delay(5000);                 // 5 seconds delay
  digitalWrite(8, LOW);            // Set on LOW as OFF
}
Android 11 Developer Preview 1 - Features
How To Make Bootable Pendrive
Related post


0 comments
Leave a reply
Please Login or Register to Comment. Get StartedShare this article

How To Make Bootable Pendrive
