How to Install Windows 10 | Step-By-Step Guide
Windows is one of the most popular and highly used Operating systems for PCs, the latest version of Windows is Windows 11. Windows 11 has been announced in JUNE 2021. In this installation, we will be looking at how you can install Windows 10 easily by simple methods.
We do understand how you feel when you are unaware of the Windows installation process. I have personally, faced the issue where I was unsure about the installation process.
This guide will take all your problems and clear out any doubts about Windows installation.
Before we move to how you can install Windows, there are few points or things that you should keep in mind.
- Windows Installation ISO file. You can download the Windows ISO official file using the Windows Media Creation Tool directly from the Microsoft Official Website. Do make a note that, Windows Media Creation Toll will only download Windows 10 or the latest (when available), so if you want to install Windows 7 you need to make arrangements for the Windows ISO file.
- You need bootable media. This media will be used as an installation source for Windows. You can have any storage with Windows installation files written on it. The most efficient way of installing Windows is from Bootable USB.
- A small knowledge of BIOS/CMOS settings. Though when you enter in BIOS Menu, you can easily navigate and find the desired options and change them as required.
- A compatible device that full fills all the minimum requirements respective to the version of Windows that you are going to install.
Make a Bootable Pen drive to Install Windows
If you are not sure of the method, how to make a USB bootable Pen Drive, just follow these few steps and you are good to go.
- Download free software called RUFUS or Balena Etcher. I would suggest going with RUFUS, it is convenient to use and you will not any issues. In case if you are familiar with Balena Etcher or any other tool to make Bootable Pen Drive you are free to use it. For this guide, we will be following RUFUS.
- Once you have downloaded RUFUS, select the Windows ISO file and hit start. For partition scheme, if you are already using Windows 7 and want to upgrade to Windows 10 choose MBR else it's good to go with the GPT partition scheme. In case you are familiar with this, just choose a partition scheme according to your hard drives.
- Now all you need to do is Hit start, the RUFUS software now erases all the data and reformat the Pen Drive to accommodate Windows Installation files and make Pen Drive bootable.
If you need a detailed guide on making bootable Pen Drive you can read the below article.
How to Boot from Bootable Pen Drive and Install Windows
This might be the trickiest part of this guide for installing Windows. To boot from a bootable pen drive in order to install Windows you need to follow some steps in sequence.
- Plugin the Bootable Pen Drive and turn off your PC and start again. After you have pressed the power button keeps on hitting, the BIOS key, most likely to be F2, F12, or DEL. These key changes from manufacturer to manufacturer. But the mentioned keys are some common keys which you can try to go with.
- Once the BIOS Menu shows up, search for Boot Menu. In the Boot Menu look for Boot Order or Boot Priority.
- Look for your Pen Drive name and move it to the top of the list. To make changes in the list, instructions would be given to you in the side menu.
- Follow those instructions to move your Pen Drive to the top of the list.
- Now you need to save the changes that you have made to Boot Order.
- Head to Exit Menu and select Exit Saving Changes. In some cases, a beep might be heard and the PC might Turn off and start again a few times. This is because it is checking and resetting BIOS as you have made some changes to it.
- Once your PC turns on, your system will automatically, start booting from your bootable Pen Drive.
- You will be greeted with the Operating systems Logo, here in this installation of Windows, Windows Logo can be seen.
Once you have gone through all these steps successfully, the rest of the steps are simple in order to install Windows.
Steps to Install Windows 10:
- Plugin your bootable Pendrive created in the above steps, and turn on your system.
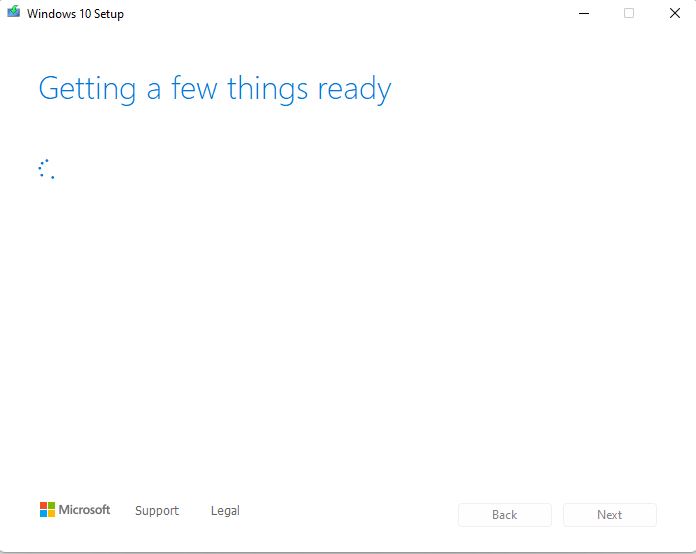
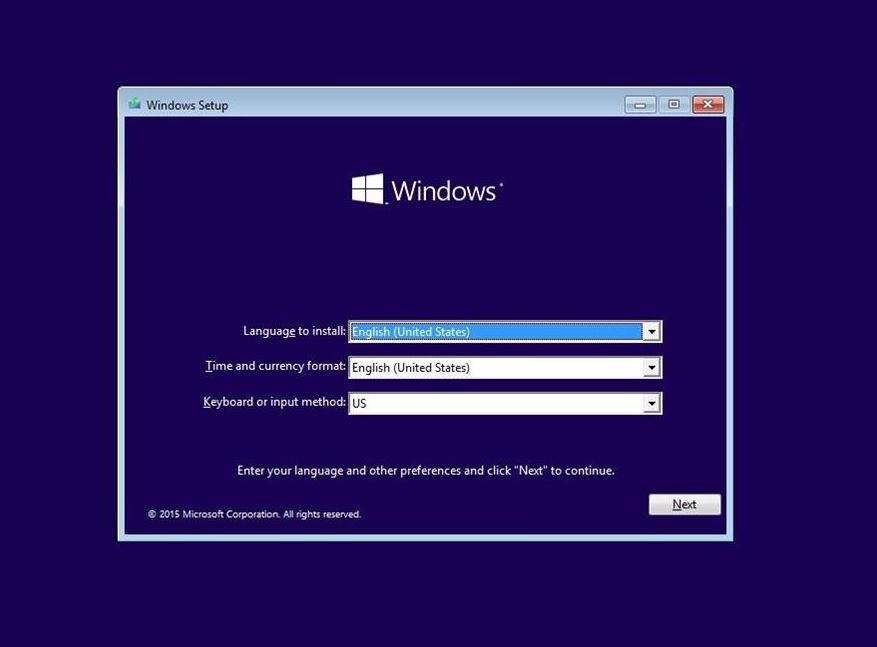
- You will be greeted with a Windows setup screen.
- Follow the instructions on the and start the Setup to Install Windows.
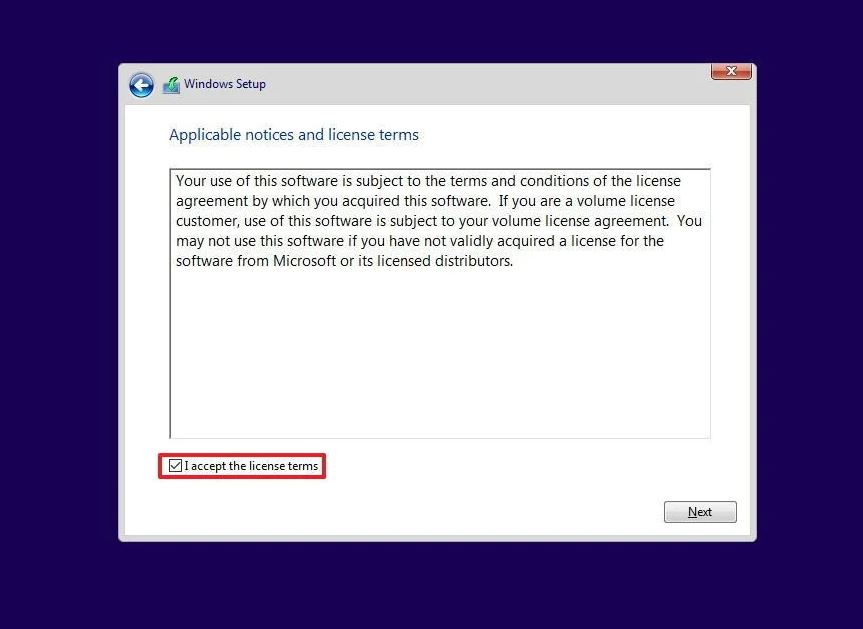
- Accept the Terms and Conditions after reading it, and hit Next.
- You will be greeted with two options, “Upgrade” and “Custom”. Upgrade option is used when you need to upgrade the system without Fresh Install, whereas the Custom option is used to install Windows as a fresh copy.
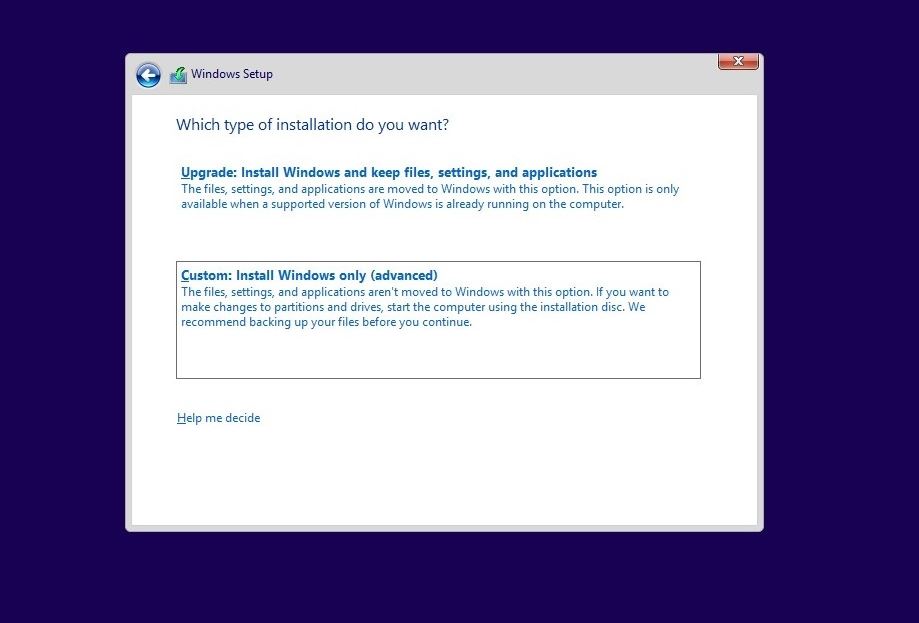
- In this guide, we are installing a fresh Windows copy so we will go with the Custom installation of Windows. Note that, in case if you want to use the Windows Upgrade option you can directly use it by plugging in Pendrive from your older Windows and run the setup just like you install any game.
- Now hit Next and choose your desired partition of Hard Drive, where you wish to install Windows.
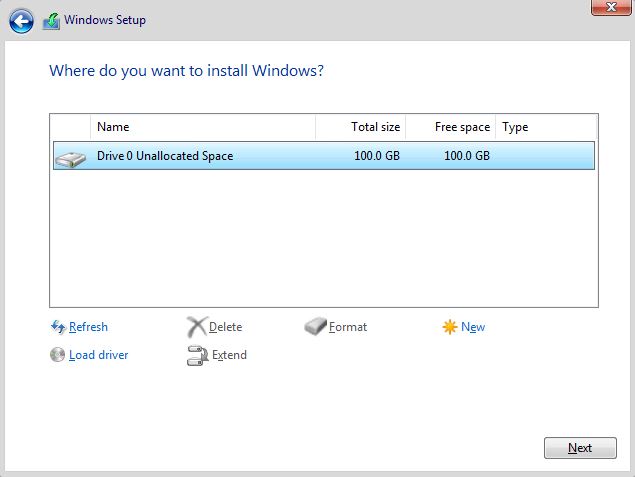
- Here you can create and manage disk partitions as per your choice and need.
- Once you hit Next all you need to do is sit and relax.
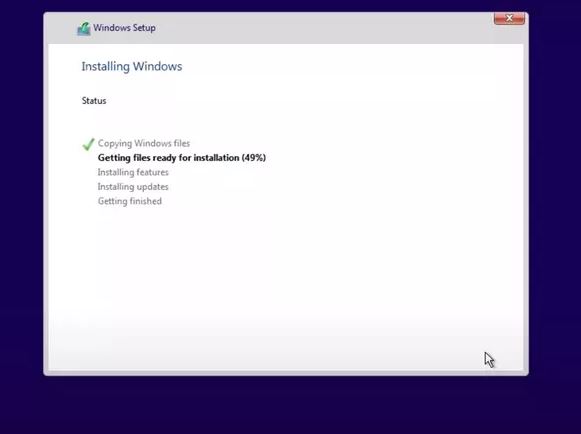
- The Windows installation will be optimizing the system for the new installation.
- Once installation of Windows has been completed, you will be greeted with a setup that will help you to do some basic settings for new Windows. Follow the screen and there you have it, Windows is All Yours, Have Fun.
This is the complete guide that will help you to easily install Windows on any System. In case if you find yourself in any trouble just put in the comment below and we would be cheerful to help you with the Windows Installation. For extra knowledge, you can check out some Frequently Asked Questions (FAQ) regarding Windows Installation.
FAQ related to Windows Installation
Q1. Do I need only Bootable Pendrive to Install Windows?
No, you can also use CD or DVD to Install Windows on your system. All you need to do is Burn the Windows Installation ISO to CD/DVD using a CD Burner such as Nero or PowerISO. Once you have successfully burnt the CD/DVD, you can follow the guide from BIOS Menu and make the CD/DVD option to the top of the list and restart your system after saving changes.
Q2. What are GPT and MBR?
GPT stands for GUID Partition Table, this is the newest partition scheme used by many Operating Systems. GPT is much more faster and accurate than MBR. GPT partition scheme enables the use of UEFI Mode of BIOS where graphics can be used inside BIOS Settings. Whereas, MBR stands for Master Boot Record. MBR is used by Microsoft up to Windows 7. MBR best supports legacy systems.
Q3. How to Install Windows 11?
The above guide is great for Windows 8, 8.1, 10, and 11. You will not find any difficulties in installing Windows on your system.
Q4 How to install Windows 7?
The above guide can also be used for Windows 7 installation, but you need to make one change. While creating a bootable USB, you need to choose MBR as Windows 7 is highly compatible with the MBR type of partitioning scheme.
Q5. Hard Drive is better or SSD is better to install Windows 10?
I would suggest going with SSD or Solid State Drive in order to install Windows 10. You can surely be getting some amazing speed advantages with SSD as compared to HDD. Check out the difference between SSD and HDD in detail.
OnePlus revealed a dual-screen smartphone
AOW 32: APPS OF THE WEEK
Related post


"Create the difference and be the change you want to see."
0 comments
Leave a reply
Please Login or Register to Comment. Get StartedShare this article

AOW 32: APPS OF THE WEEK
