How to Change DNS Settings on Windows 11
Changing the DNS settings on Windows 11 is essential if you want to increase your privacy. Whether you're accessing a website or an app that is trying to connect to its server in the background, it will secure all internet communication on your computer. Learn how to modify DNS settings in Windows 11 in this comprehensive guide if you are new to this domain.
Change DNS Settings in Windows 11 (2022)
This post includes five techniques for altering Windows 11's DNS settings. Along with that, we have discussed DNS and the rationale behind changing your PC's DNS settings. To read the explainer or to get right to the desired approach, expand the table below.

What is DNS in Windows 11?
The internet's DNS, or Domain Name System, functions like a phonebook. Your computer connects to a DNS server when you open a website in order to determine the website's IP address. It finds the location in this way and links you to the website in this way. To avoid having to memorise lengthy website IP addresses, you need a DNS server.
There are several DNS servers available, including those provided by ISPs, Google, Cloudflare, OpenDNS, and others. Each DNS server asserts that it can obtain data more quickly than the competition. Some have lower latency while others provide built-in security features like DNS-over-TLS. Which one you use on your Windows 11 computer will depend on your preferences.
That said, ISPs are increasingly collecting DNS queries, which is bad for your privacy, which is why I advise customers to change the default DNS server in Windows 11. This implies that the DNS log can be used by your Internet provider to determine which website you visited. Use custom DNS servers that are well-known, do not track your searches, provide dependable speed, and offer security against phishing and malware assaults in order to be on the safe side.
Now that it is obvious, let's learn about several well-known DNS servers for Windows 11.
You can use the following free and well-liked DNS servers on your Windows 11 computer. Both the preferred (also known as primary) and alternate (commonly known as secondary) DNS addresses of well-known services have been added.
1. Cloudflare
Preferred DNS: 1.1.1.1
Alternative DNS: 1.0.0.1
2. Google
Preferred DNS: 8.8.8.8
Alternative DNS: 8.8.4.4
3. OpenDNS
Preferred DNS: 208.67.222.222
Alternative DNS: 208.67.220.220
4. Comodo Secure DNS
Preferred DNS: 8.26.56.26
Alternative DNS: 8.20.247.20
5. Quad9 DNS
Preferred DNS: 9.9.9.9
Alternative DNS: 149.112.112.112
Change DNS Server Using Settings App in Windows 11
In Windows 11, changing the DNS server is made simple by using the Settings menu. You can use both IPv4 and IPv6 protocols to define the DNS. Here's how to approach this procedure:
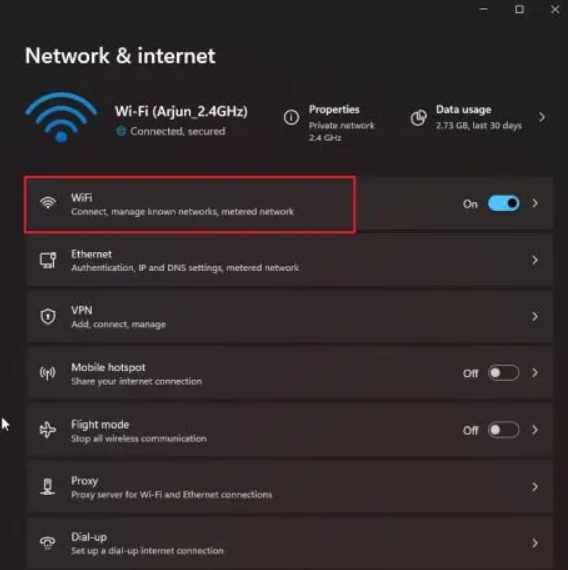
- To launch the Settings app, using the Windows 11 keyboard shortcut "Windows + I." Click "Wi-Fi" in the right pane after navigating to the "Network and Internet" settings menu from the left sidebar. Click "Ethernet" if you have a wired Ethernet connection.
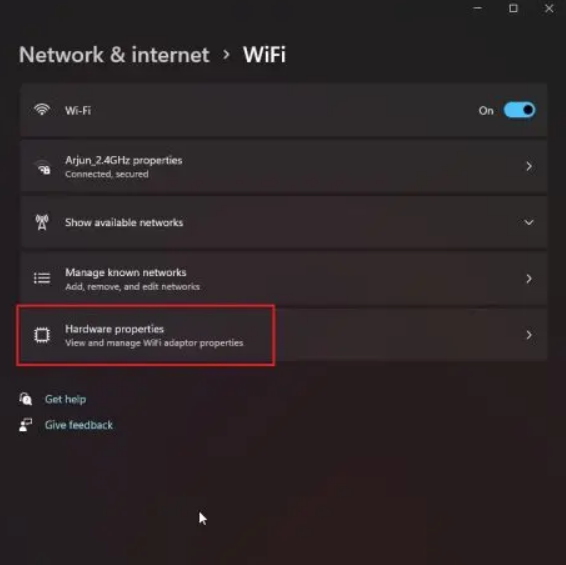
- Go back and find "Hardware properties" by scrolling down. Launch it.
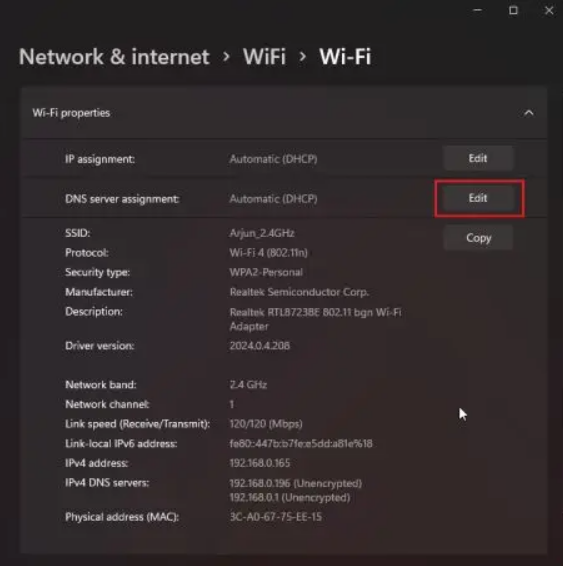
- Click "Edit" next to "DNS server assignment" to continue. The DNS server selected by your ISP will be used by Windows 11 because the setting will be "Automatic (DHCP)". We must make this change.
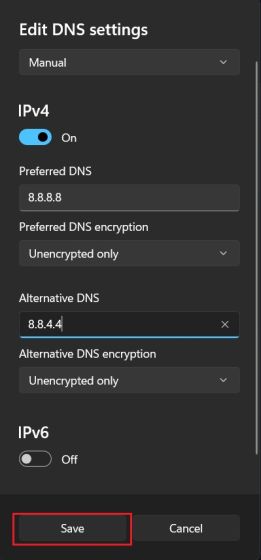
- Choose "Manual" from the drop-down menu on the following page, then turn on the "IPv4" toggle.
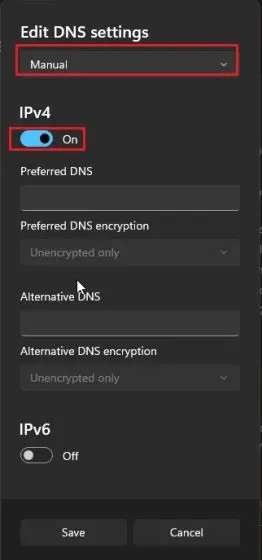
- After that, enter the custom DNS server address you want to use in the "Preferred" and "Alternative" DNS sections. Our article with the linked page has information on the top DNS servers. The DNS server that I typically use is that of Google, and it is as follows:
- Preferred DNS:
8.8.8.8 - Alternative DNS:
8.8.4.4
- Preferred DNS:

- You've now successfully changed the DNS server in Windows 11 by clicking "Save." Continue to the next step if you also want to learn how to make all DNS requests on Windows 11 encrypted by turning on DNS-over-HTTPS.
- Change the encryption type to "Encrypted exclusively (DNS over HTTPS)" by selecting it from the drop-down box next to "Preferred" and "Alternative" DNS encryption.
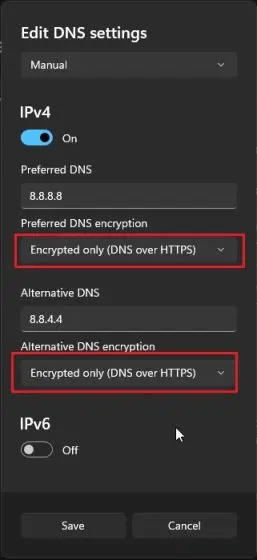
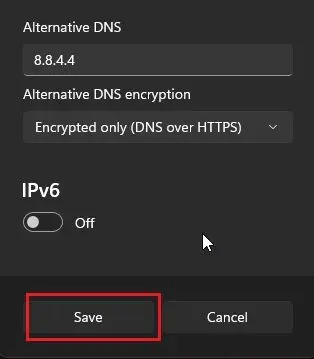
- Then simply click "Save" to finish. You have added encryption to all of your DNS queries in Windows 11, which will increase the security of network connection on your PC along with a custom DNS server.
Change DNS Server from Control Panel in Windows 11
If you're a dinosaur like me and prefer to modify the DNS server on Windows 11 using the Control Panel, go to the instructions below.
- The Run prompt window can be opened by pressing "Windows + R." Enter the ncpa.cpl command here.
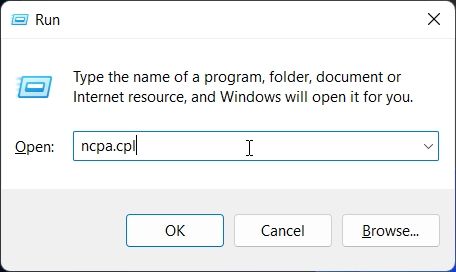
- By doing so, the Control Panel's Network and Internet window will be displayed immediately. In Windows 11, you may also manually launch Control Panel and navigate to the "Network and Sharing Center" section.
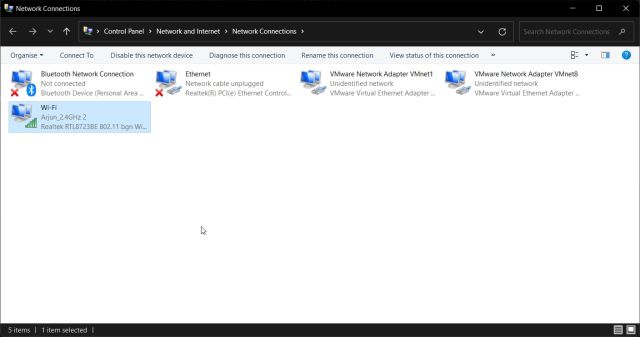
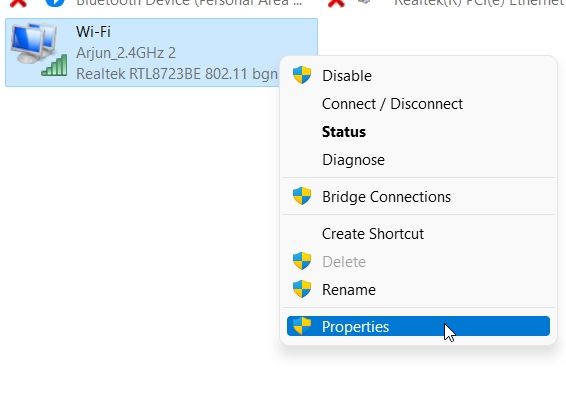
- Right-click on your "Wi-Fi" adapter and choose "Properties" once you've arrived. When using a wired Ethernet connection, choose "Properties" from the context menu when you right-click on "Ethernet".
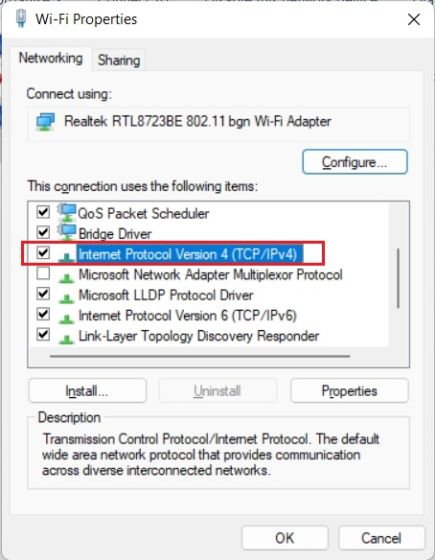
- Next, click twice on "Internet Protocol Version 4 (TCP/IPv4)" by scrolling down.
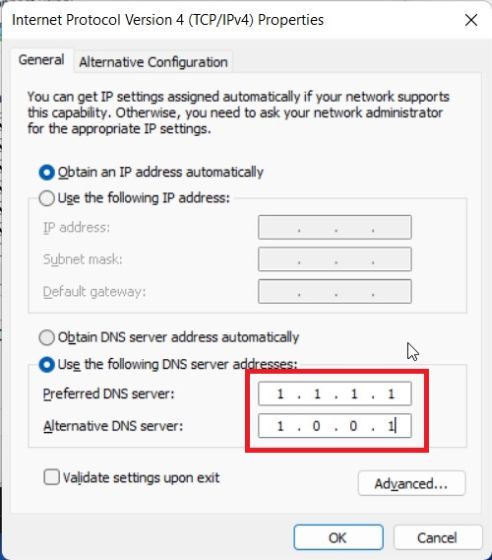
- Now a new pop-up window will appear, where you must choose "Use the following DNS server addresses." We're going to configure our own DNS server here.
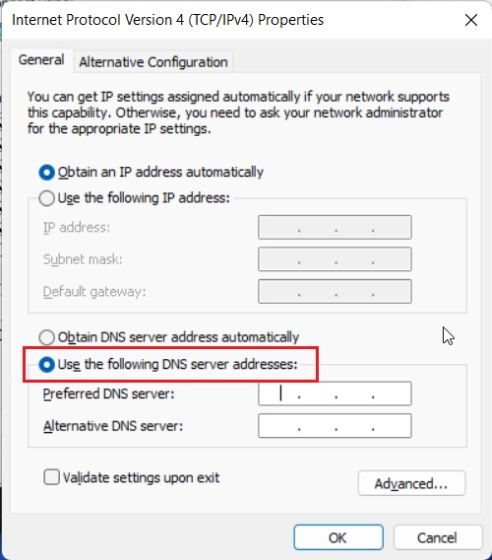
- Now fill in the blanks for the Preferred and Alternative DNS servers. As an illustration, I'm utilising the DNS servers listed below from Cloudflare. You're free to make your own decision.
- Preferred DNS:
1.1.1.1 - Alternative DNS:
1.0.0.1
- Preferred DNS:
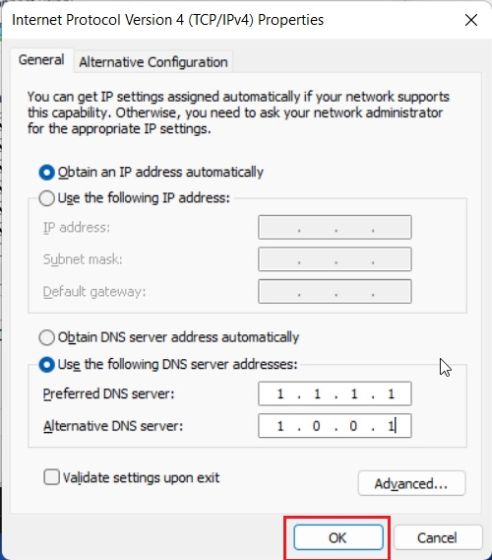
- Finally, click "OK," and you're done. On your Windows 11 computer, you have configured a unique DNS server.
Change DNS Settings Using Command Prompt (CMD)
You can modify the DNS settings using Command Prompt in addition to Windows Settings and Control Panel. A few commands will provide you all you need. The steps you must take are as follows:
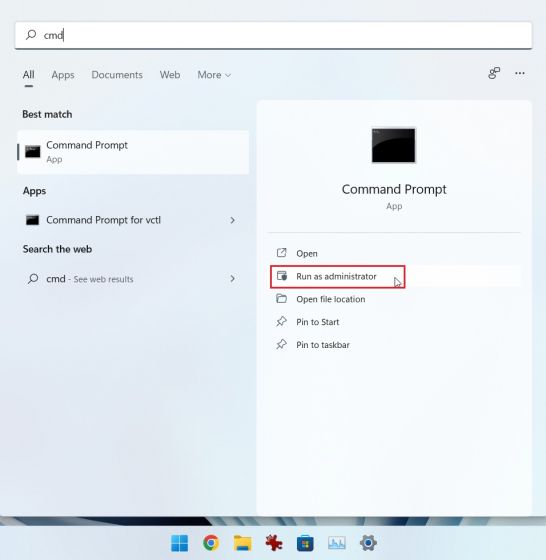
- When the search box appears, press the Windows key and enter "cmd." Click "Run as Administrator" in the right pane at this point. Read our linked instruction if you wish to launch apps in Windows 11 with administrative privileges at all times.
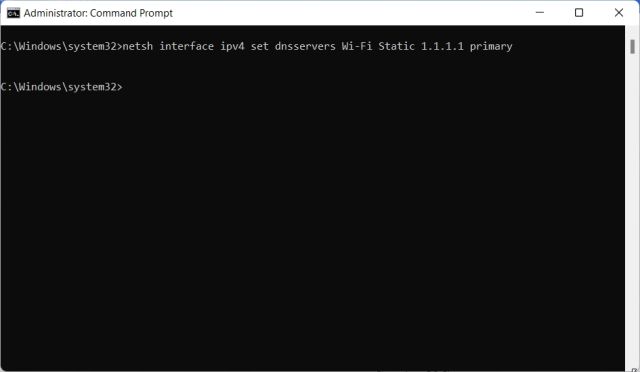
- Run the command shown below next in the CMD window. Make sure to swap preferred out for your server's primary DNS. For instance, I used 1.1.1.1, the suggested DNS server for Cloudflare. Additionally, in the command below, swap out Wi-Fi with Ethernet if you're using that instead.
- Run the command below to configure a different DNS server using Command Prompt. Here, substitute the backup DNS server for Alternative. The alternate DNS is 1.0.0.1 from Cloudflare.
netsh interface ipv4 set dnsservers Wi-Fi Static preferred primary
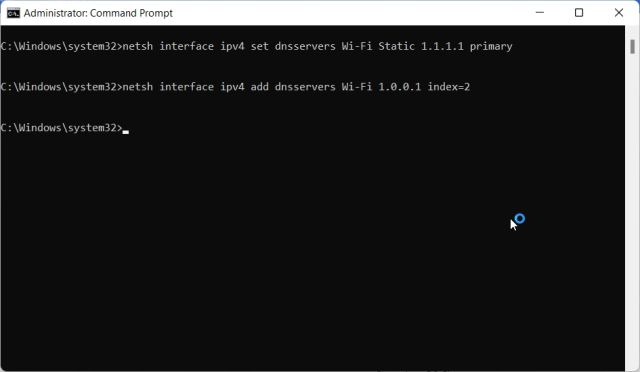
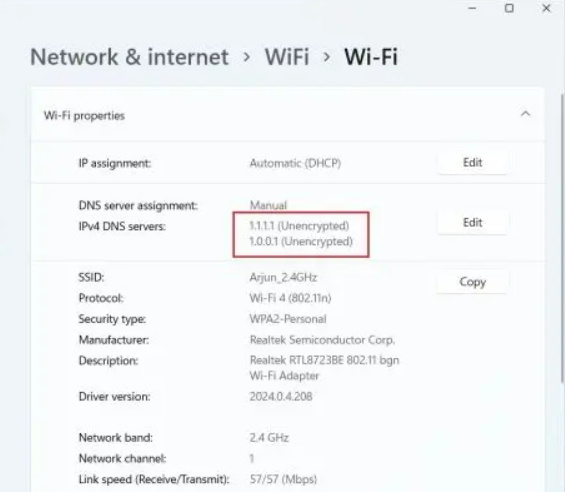
- You're done now. You will see that the custom DNS servers have been updated when you open the Settings app.
netsh interface ipv4 add dnsservers Wi-Fi Alternative index=2
- Use the command shown below in CMD on your Windows 11 computer to restore the DNS settings to Automatic (DHCP).
netsh interface ip set dns "Local Area Connection" dhcp

Oppo to Bring 240W Fast Charging Soon
Related post


0 comments
Leave a reply
Please Login or Register to Comment. Get StartedShare this article