Top 10 Hidden Windows 11 features
Windows 11 and if you already have the replace of Windows 11 function then you can improve freely friends. At existing I have additionally upgraded my laptop computer to Windows eleven and its going for walks very quickly and clean something the UI of home windows eleven has come to be very easy and cell UI.
Windows 11 is no longer simply a stunner however its UI has modified a lot from different UI. Its UI is precisely like the UI of the cellular however many elements have been brought to it, which is very stunning and useful, and now not solely this, there is a lot of splendid characteristic A which is very beneficial and you can additionally disable the function which you do now not like comfortably.
Here are the features of Windows 11:
- Windows 11 Taskbar
- Windows 11 Focus Mode
- Windows 11 Folders On Start
- Windows 11 Type With Voice
- Windows 11 Legacy Right-Click
- Windows 11 Multiple Desktops
- Windows 11 Snap Layouts
- Windows 11 Shake To Minimize
- Windows 11 Themes
- Windows 11 Dynamic Refresh Rate
- Windows 11 Auto HDR
1. Windows 11 Taskbar
The taskbar will now be moved to the new position on your Windows 11 PC. Fortunately, Windows 11 lets you move taskbar icons to the left edge through a native option in the Settings app. Here’s how to set it: 1. Open the Settings app, switch to the “Personalization” tab from the left sidebar, and click on “Taskbar” .
2. Windows 11 Focus Mode
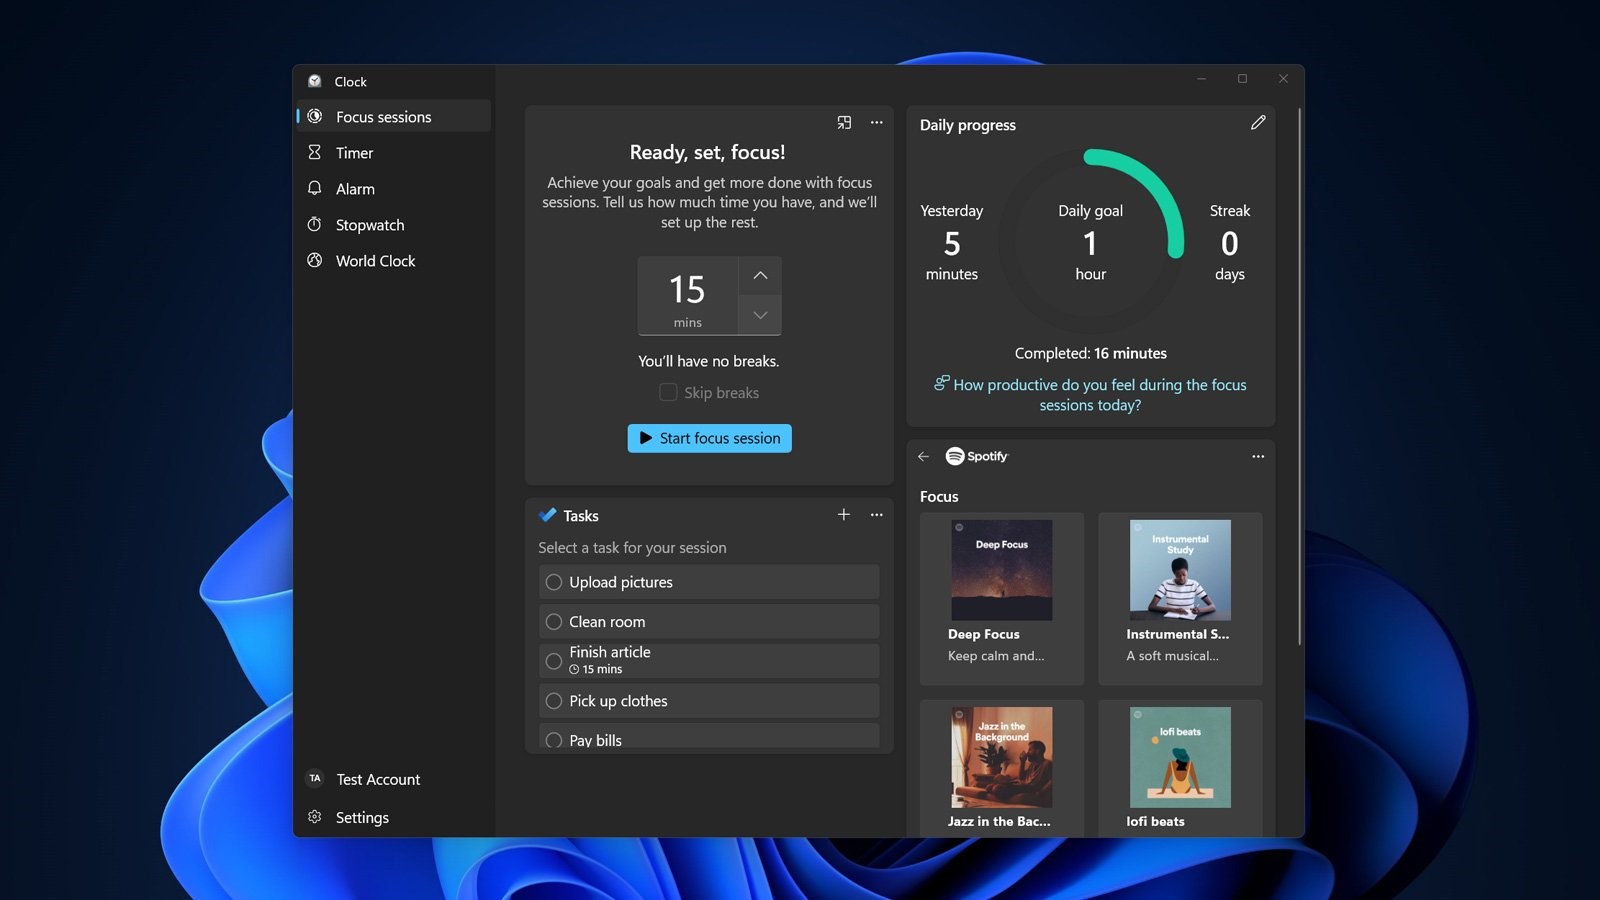
It is a handy feature on Windows 11 which allows you to get rid of unnecessary notifications, messages, and alerts. The Focus assist feature enables you to customize your priority list rather than barricading your PC from all the notifications. Distraction can cause harm to your productivity. With hybrid working and learning becoming the norm, focusing on digital health has never been more important, and the new Focus Sessions feature is designed to help.
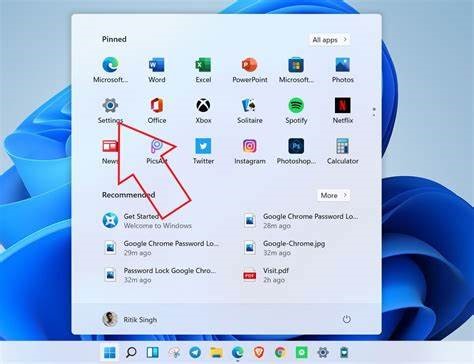
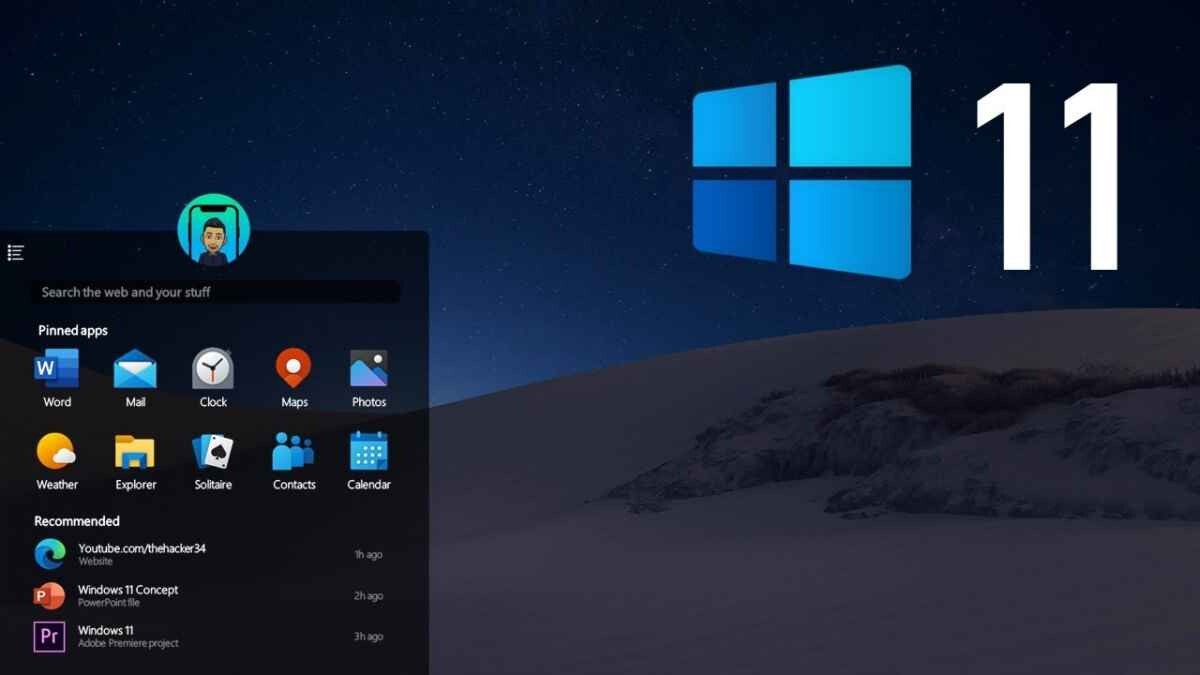
3. Windows 11 Folders On Start
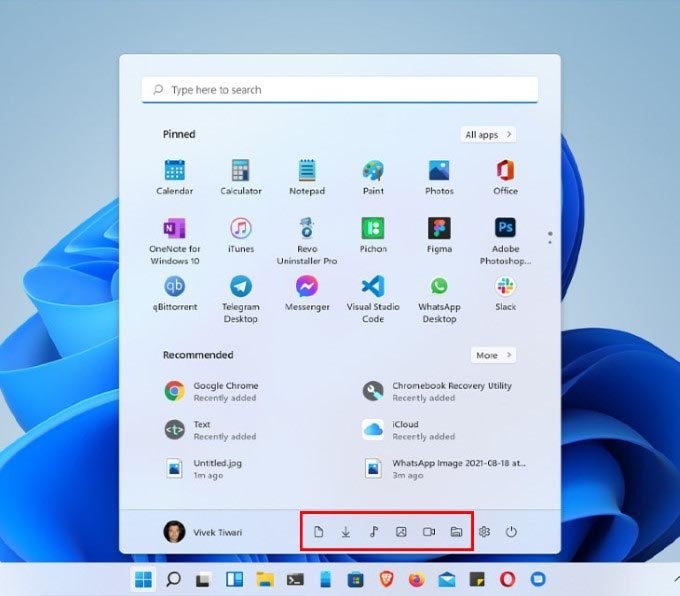
System folders are disabled by default on the Windows 11 start menu, but they can be enabled via Settings. So, if you want to add or remove system folders on Windows 11 Start menu, you are reading the right article. In this article, we will share a step-by-step guide on how to add or Remove system folders on the Windows 11 Start menu. You can add or remove startup programs using a menu built into the Windows 11 settings menu.
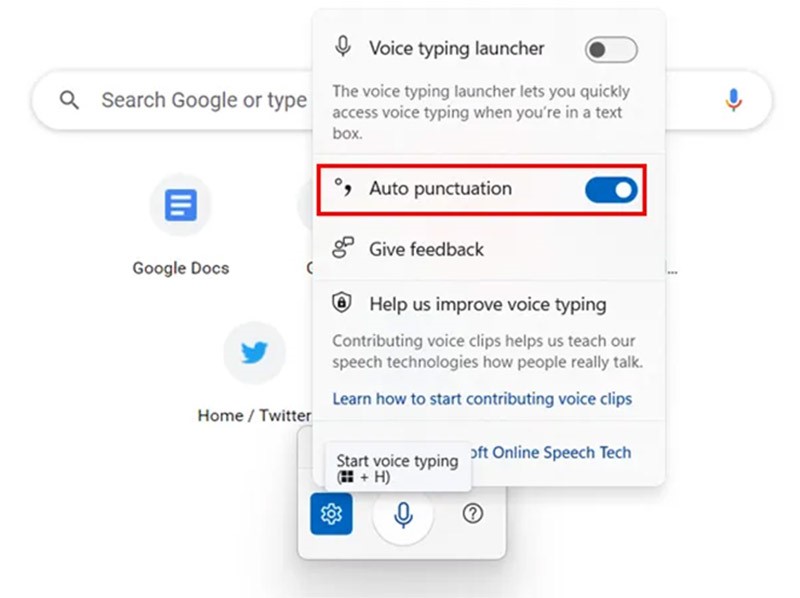
4. Windows 11 Type With Voice
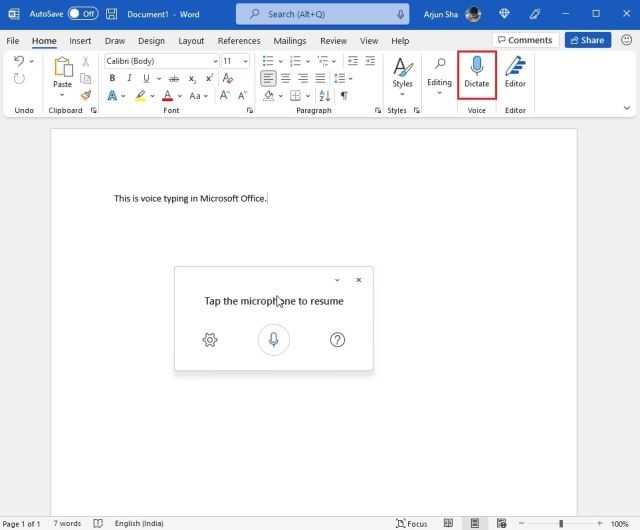
The new Voice Typing tool in Windows 11 detects the punctuation in your tone and auto-punctuates the text. There are a few catches though. It only works with certain languages. The revamped Windows 11 touch keyboard, typically used for 2-in-1 laptops such as the Microsoft Surface Pro 7, now has more familiar gestures that many people already use with their phones. This includes swiping and dragging your finger to type a word — without needing to lift a finger.
5. Windows 11 Legacy Right-Click
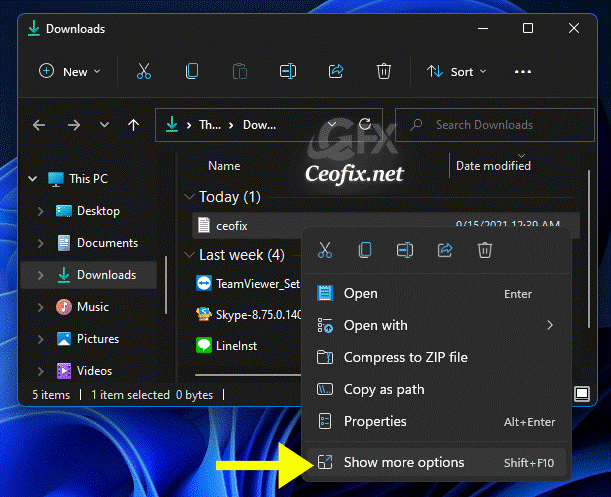
First, Right-click on your desktop, inside any folder, or by selecting any file/folder from File Explorer. You will now see the new Windows 11 context menu on the screen. Among the options, choose “ Show More Options ” at the bottom of the new menu. You will now see the same old right-click menu from Windows 10 for the selected file or folder. As of now, there is no way to get rid of the new menu and go back to the old menu forever. Instead, you can open the classic right-click menu from Windows 10 on your Windows 11 PC. Let’s see how.
6. Windows 11 Multiple Desktops
Press Win + Tab or click the Task View button, right-click on the target virtual desktop, and click Choose background from the context menu. In the Windows Settings interface, choose one based on your liking. To rearrange multiple virtual desktops, you can click Taskbar view, click the virtual desktop, hold and drag it to the desired position.
Switch Windows 11 Virtual Desktop 1 Via Task View: Put the mouse cursor on this Task View button and choose the virtual desktop you want to access. 2 Via keyboard shortcut: Press the Win + Tab keys on the keyboard and select the virtual desktop you want to go to.
7. Windows 11 Snap Layouts
Windows 11 brings us many new features compared with previous Windows 10 and one of them is called Snap Groups (Snap Layouts). Although you have already been able to do multiple tasks at the same time in Win10 by snapping windows to various places on your monitor, Snap Group moves a step further and makes multitasking more convenient for you. In the window you want to Snap, press Win + Arrow Key in the direction you want to position the window. After you move the first window, the Snap dialog will appear in the empty space. Currently, you can choose from six different Snap Layouts: An equal screen split
8. Windows 11 Shake To Minimize
Click on the windows tab you wish to remain open, then shake the device horizontally. All opened windows and tabs will automatically minimize except the one tab you hold. Oftentimes, though, you just wanted to move the open window. It’s useful when you want to compare things side-by-side. Windows button + Up will upscale your window to fullscreen in an instant. Windows button + Down will restore your window to its original size. If you press the Windows button + Down again, it will minimize the window.
If a notification pops up and you want to close everything except that notification, just give it a shake! It works simply. Click on the windows tab you wish to remain open, then shake the device horizontally. All opened windows and tabs will automatically minimize except the one tab you hold.
9. Windows 11 Themes
Aero Glass is another great theme for Windows 10 that will be compatible with Windows 11 as well. The theme offers a glassy transparent interface that resembles the new taskbar and it does so without changing the layout of the original Windows OS. A theme is a combination of desktop background pictures, window colors, and sounds. To get a theme, expand one of the categories, click a link for the theme, and then click Open.
10. Windows 11 Dynamic Refresh Rate
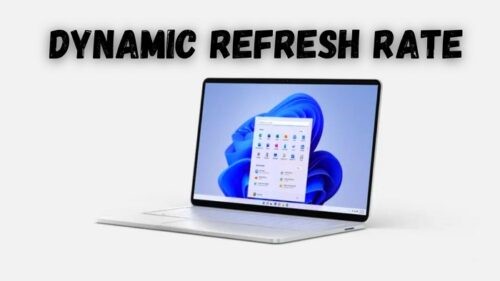
That includes a display that supports variable refresh rate (VRR) and at least 120 Hz, a graphics driver that supports it, and enabled support from Windows 11. However, this is still a work in progress, and Microsoft will keep expanding the support for various games and apps. Open Windows Setting using the Win + I hotkey. Navigate to System > Display and click on the Advanced display option. On the Advanced display page, find the option Choose a refresh rate. Select one of the static values, e.g. 60Hz or 120Hz from the drop-down menu.
11. Windows 11 Auto HDR
Enabling HDR in Windows 11 is easy, and similar to the previous OS versions. There are many other gaming-oriented additions to this new operating system. This software will repair common computer errors, protect you from file loss, malware, hardware failure and optimize your PC for maximum performance.
Turn on Auto-HDR from the settings Press the Windows Key + S or click on the Start Menu icon located in the middle of the taskbar. Click on the Settings icon. Once the Settings window opens, go to System. Then, go to Display Settings. Next, click on Windows HD Color settings. Enable all the HDR settings you need, and you are good to go.
Conclusion
If you do no longer like any function in Windows 11, then you can use it as Windows 10 also. According to the title, Windows eleven has many points that you have to know, so let’s study further.
GOW 8: Games of the Week
Related post


0 comments
Leave a reply
Please Login or Register to Comment. Get StartedShare this article